Trending: Rough Textured Walls
In recent years, rough textured walls have emerged as a popular trend in interior design. This unique style adds depth, character, and visual interest to any space, making it a favored choice among homeowners and interior decorators alike. In this article, we’ll delve into the world of rough textured walls, exploring their benefits, techniques for creating them, materials required, and maintenance tips.
Introduction to Rough Textured Walls
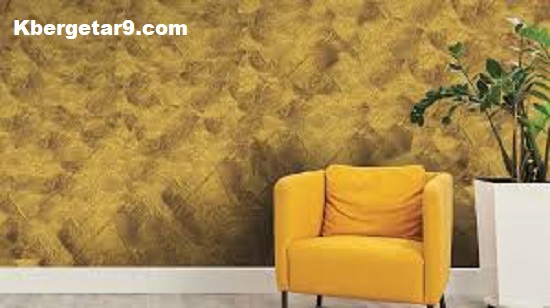
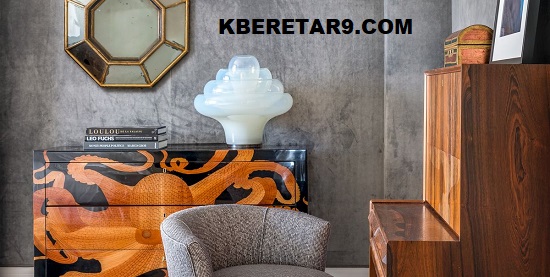
Rough textured walls refer to walls that have a tactile surface, often characterized by uneven patterns and irregularities. Unlike smooth, flat walls, rough textured walls add dimension and personality to a room, creating a distinct ambiance that can range from rustic to contemporary.
Benefits of Rough Textured Walls
Increased Aesthetic Appeal
One of the primary reasons for the popularity of rough textured walls is their ability to enhance the visual appeal of a space. The texture adds depth and interest, transforming an ordinary wall into a captivating focal point.
Concealing Imperfections
Another advantage of rough textured walls is their ability to conceal minor imperfections and flaws in the wall surface. Instead of highlighting dents or unevenness, the texture camouflages these blemishes, creating a smoother, more uniform appearance.
Durability and Longevity
Rough textured walls are not just visually appealing; they’re also durable and long-lasting. The texture adds an extra layer of protection to the wall surface, making it more resistant to wear and tear over time.
Popular Techniques for Creating Rough Textured Walls
There are several techniques for creating rough textured walls, each offering its own unique aesthetic. Some of the most popular techniques include:
Skip Trowel Technique
The skip trowel technique involves applying a thin layer of joint compound or plaster to the wall surface and then using a trowel to create random patterns and textures. This technique produces a subtle, organic look that resembles the texture of natural stone or stucco.
Knockdown Technique
The knockdown technique begins with applying joint compound or plaster to the wall surface, followed by using a trowel to spread the material evenly. Once the compound starts to set, a trowel or drywall knife is used to “knock down” the texture, creating a flattened, mottled finish.
Sand Swirl Technique
The sand swirl technique utilizes a mixture of joint compound, water, and sand to create a textured surface with swirling patterns. This technique is achieved by applying the mixture to the wall surface and then using a texture brush or trowel to create swirling motions.
Materials and Tools Required
Before embarking on a rough textured wall project, it’s essential to gather the necessary materials and tools. Some common items include:
- Plaster mix or joint compound
- Trowel or texture brush
- Sandpaper (for smoothing rough spots)
- Painter’s tape (for masking off areas)
Step-by-Step Guide to Creating Rough Textured Walls
1. Preparing the Surface
Begin by cleaning the wall surface and repairing any cracks or holes. Apply a coat of primer to ensure proper adhesion of the texture material.
2. Applying the Base Coat
Mix the plaster or joint compound according to the manufacturer’s instructions and apply it to the wall using a trowel or roller. Ensure an even application across the entire surface.
3. Creating Texture
Once the base coat is applied, use your chosen technique (skip trowel, knockdown, or sand swirl) to create the desired texture. Work in small sections, blending the texture for a seamless finish.
4. Adding Finishing Touches
Allow the textured wall to dry completely before sanding down any rough spots or imperfections. Once smooth, apply a coat of paint or sealant to protect the texture and enhance its appearance.
Maintenance Tips for Rough Textured Walls
To keep your rough textured walls looking their best, follow these maintenance tips:
- Regularly dust the walls to prevent buildup of dirt and debris.
- Avoid using abrasive cleaners or scrubbing brushes, as these can damage the texture.
- Touch up any chips or scratches with matching paint or texture material as needed.
Conclusion
Rough textured walls offer a versatile and stylish option for enhancing the aesthetics of any space. Whether you prefer a subtle, understated texture or a more dramatic, pronounced pattern, there are numerous techniques and finishes to choose from. By following the steps outlined in this article and incorporating your creativity, you can transform ordinary walls into stunning works of art that reflect your unique style and personality.
FAQs (Frequently Asked Questions)
- Can rough textured walls be used in any room of the house?
- Yes, rough textured walls can be used in virtually any room, including living rooms, bedrooms, kitchens, and bathrooms.
- Are rough textured walls difficult to maintain?
- Not at all. With proper care and maintenance, rough textured walls can remain looking fresh and vibrant for years to come.
- Can I DIY rough textured walls, or should I hire a professional?
- While DIY is possible, it may require some practice and skill to achieve the desired results. Hiring a professional can ensure a flawless finish.
- Can I paint rough textured walls?
- Yes, rough textured walls can be painted to match any color scheme or design aesthetic.
- How long does it take to create rough textured walls?
- The time required depends on various factors, including the size of the room, the chosen technique, and drying times. Generally, it can take a few days to complete a rough textured wall project from start to finish.